Ikea kitchen storage solutions

What’s the best thing you’ve ever bought at IKEA? The next time you venture there, all you need to buy are these four items, which have helped me transform my kitchen storage issues:

1. BYGEL rail £2.

Attaching these rails to my pots and pans cupboard door to hold lids has stopped me screaming every time I open it. I can now find the right lid for the right pan. Do it, if you haven’t already.

2. VARIERA shelf insert £2.

These little shelves have doubled my cupboard capacity. Is it going too far to say they have changed my life?! You NEED to get these.

3. BEKVAM spice rack £3.

Attaching these spice racks to the inside of your food cupboard doors adds so much extra storage. They also makes things easier to see.

4. KNUFF magazine files £6.75.

Screwing these to the inside of kitchen cupboards adds space to store more bulky items like chopping boards, cleaning products etc.

I know this post is a bit dull (and I promise it is not sponsored by Ikea) but adding these items to my kitchen cupboards really has made a difference. Just wanted to share the storage love…

Katy x


Hanging jelly planters

Last week I told you about how much I love jelly moulds and how I hanker after an Angus and Celeste hanging jelly planter. Well, I have successfully made my own and I have to say these are the best things I have ever made. I really do love them and they cost me the grand total of about £15: £10 for the jelly moulds and £5 for the chains and hooks. Here’s how I did it…

You will need:

Metal jelly moulds – I bought mine from eBay and searched for ‘vintage metal jelly moulds’.

Chain from  Homebase

S-hook from Homebase

Ceiling hook from Homebase

Pliers

Hammer and a centre punch or a drill

Plants

Tutorial:

DIY hanging basket made from vintage jelly mould

I bought an enamel jelly mould and an aluminium blancmange mould, which is ring shaped.

DIY hanging basket made from vintage jelly mould

1. Either drill or use a hammer and a centre punch to make three, evenly spaced holes around the edge of your mould. If you intend to plant straight into your mould you will also need to put a few drainage holes in the bottom of it. However, if you want to hang your planter inside, and therefore do not want water draining onto your floor, either keep your plants in their plastic pots or put a layer of small drainage pebbles at the bottom of the mould.

DIY hanging basket made from vintage jelly mould

2. Use the pliers to unlink your chain to make three identical lengths. Hook the end of each length through your holes and use the pliers to close the link together again.

DIY hanging basket made from vintage jelly mould

3. Make sure your chains are all exactly the same length so your planter will hang straight.

DIY hanging basket made from vintage jelly mould

4. Hook the ends of your chains onto the S-hook and you’re done!

DIY hanging basket made from vintage jelly mould

I want to hang the enamel mould in my kitchen so I have left the plant in its pot and not made any drainage holes in the mould. I have chosen this Rose Moss, which is perfect for a hanging planter as it sprawls over the edges.

DIY hanging basket made from vintage jelly mould

DIY hanging basket made from vintage jelly mould

DIY hanging basket made from vintage jelly mould

I am going to hang this planter on my balcony so I have planted some Violas straight into it and I made drainage holes in the mould.

DIY hanging basket made from vintage jelly mould

I don’t really like traditional hanging baskets because they remind me of the ones that hang outside pubs. However, using something different like these jelly moulds make them so much more interesting. They are also perfect for us now because Otto is obsessed with eating plants and these are well out of his way!


How to reupholster a drop-in seat

I often come across dining chairs that I like the shape of but the seats are ruined or covered in horrible, old fabric. Usually, these chairs are very, very cheap but I’ve always walked away in the past because I’ve thought that to re-upholster the seat is a professional’s job and it would cost me a fortune.

However, I recently recovered a Lloyd Loom laundry basket, which isn’t too dissimilar to a seat pad, and I realised how easy it is.  So I want to show you how simple and cheap it can be to transform a good chair.

I have found the perfect fabric to match the chair. Lorna Syson is a designer of contemporary interior accessories, including fabric, wallpapers, lampshades and cushions. I love the retro edge and the influence of the Great British outdoors. I fell in love with one particular print that I decided to use for my chair and I now want a whole room wallpapered in it!

You will need:

Lorna Syson fabric

Your choice of medium weight fabric. I’m using this gorgeous Lorna Syson fabric, which is called Flock Sunrise.

How to reupholster a drop in seat pad

Webbing, upholstery tacks and a staple gun. I bought the webbing and tacks from Heritage Upholstery Supplies, which is a great online shop with lots of information about each product – perfect for the novice. I bought 50g of the 13mm improved tacks and 5m of the quality elastic webbing 25.

Foam for reupholstering seat pads

You need foam for the seat pad. I always buy it from efoam as they cut it to measure. I chose a 5cm thick piece as I want my seat well padded but you can choose a thinner base.

Cotton webbing

Polyester wadding that I buy from eBay.

Spray glue

Hammer

Pliers (or an upholstery tack remover if you have one)

Tutorial:

How to reupholster a drop in seat pad

The ‘before’ shot. Enough to put you off buying the chair?

How to reupholster a drop in seat pad

1. Remove the tacks holding the old fabric in place. Use pliers or an upholstery tack remover if you have it. I have to say this was the most difficult part! Keep the old fabric, as this can be the pattern for your new fabric.

How to reupholster a drop in seat pad

2. Remove all the old webbing and padding.

How to reupholster a drop in seat pad

3. Remove the tacks that held the webbing in place.

How to reupholster a drop-in seat pad

4. When your frame is free of tacks you need to begin attaching your new webbing. Cut pieces of webbing to stretch the length and width of the frame and add 10cm so that you can fold back 5cm at each end of the webbing. Lay each piece side by side and make sure they are taut when you tack them with your hammer.

How to reupholster a drop-in seat pad

5. Now attach the widthways strips in a similar way, but weaving them in and out of the webbing already in place.

How to reupholster a drop-in seat pad

6. Spray the woven base with glue and stick the foam on top of it.

How to reupholster a drop-in seat pad

7. Place the frame, foam side down, on the wadding and staple gun it onto the underside of the frame, pulling it as tautly as possible. This helps to smooth the corners and edges of the foam.

How to reupholster a drop-in seat pad

8. Place the frame, foam side down, onto your fabric. Make sure you have the pattern facing in the right direction. Begin tacking the fabric onto the underside of the frame, working outwards from the middle. I did one tack in the middle of the front of the seat and then one tack in the middle of the back of the seat and so on. This way your fabric remains taut and in the correct position. Next do the sides, leaving the corners until last. I turned the raw edge over and used enamel pins for a neat finish. However, you can use the staple gun or tacks as you won’t be able to see it when the chair is put back together. If you want to, for a neat finish, you can buy a piece of hessian 5cm bigger than the size of your seat frame. Place it over the underside of the chair, then turn the raw edges and staple or tack close to the folded edge.

How to reupholster a drop-in seat pad

9. When you get to the corners you need to pull the fabric over the corner as tautly as possible and secure it with a tack.

How to reupholster a drop-in seat pad

10. Fold over one side and tack it.

How to reupholster a drop-in seat pad

11. Fold over the other side and add another tack (I’ve used an enamel pin but this is not necessary). The thicker your fabric, the trickier this step is.

How to reupholster a drop-in seat pad

12. The most important thing when you are doing the corners is to make sure the fabric is as taut as possible.

How to reupholster a drop-in seat pad

Finished! Pop your seat pad back in the chair (with some chairs you will need to screw them in).

How to reupholster a drop-in seat pad

I love the combination of the yellow of the fabric and the honey tones of the wood. Perfect!

How to reupholster a drop-in seat pad

And look who else likes it…

I hope you all have a go – it really is very easy and the best bit is you can’t see the bottom so if you make any mistakes it doesn’t matter. Such an easy way to transform an old piece of furniture.

Thank you very much to the lovely Lorna Syson for the beautiful fabric. Do have a peek at her website and here are a few of my other faves from her collection:

Lorna Syson Blizzard fabric

I love the beautiful greys and angular shapes of this Blizzard fabric.

Modern prints with a retro aesthetic, like these cushions, work really well with vintage furniture.

Lorna Syson Flock Sunrise wallpaper

I really want the Flock Sunrise wallpaper too!

Hope you all have a great weekend x


Jelly moulds

When I was a child I had the most amazing birthday parties. Highlights were the games, the novelty cake my mum always made (the Care Bear one was my favourite) and the rabbit shaped jelly. We had a burgundy plastic rabbit-shaped jelly mould that I have always remembered. Anyhoo, I’m getting off the point.

The point is I love a jelly mould. The more vintage, the better. When I came across these jelly mould hanging planters from Angus and Celeste I was at the ready with my bank card. However, I realised they were very expensive and the company is based in Australia and the shipping alone was going to cost $45! I just couldn’t justify spending that much on a hanging planter – although I would happily accept it as a present (Jules, I hope you’re reading this).

So, feeling inspired, I am going to try to make my own next week, but I want to show you the original, just in case you are feeling richer than I am…

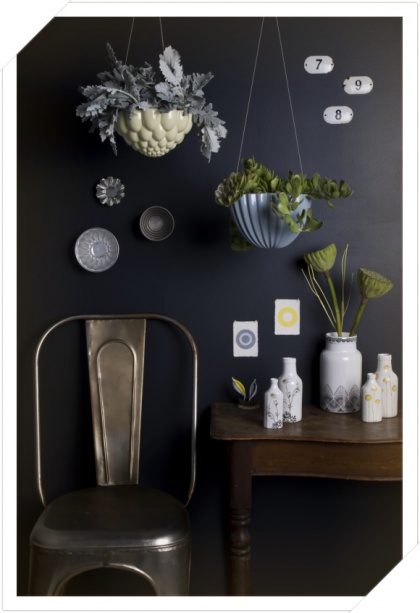
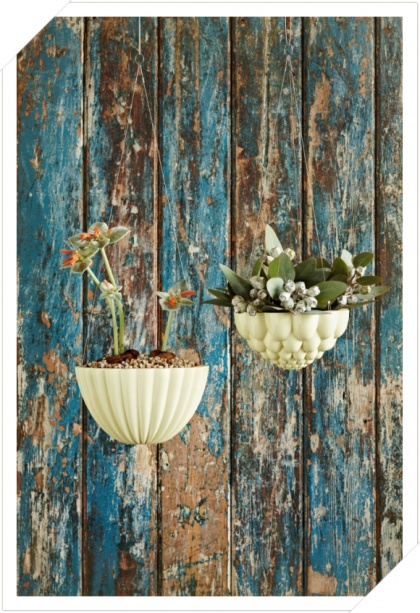
Angus and Celeste Hanging jelly mould planter collection

Angus and Celeste Hanging jelly mould planter white

Angus and Celeste Hanging jelly mould planter green

Angus and Celeste Hanging jelly mould planter blue

Angus and Celeste Hanging jelly mould planter pink

Angus and Celeste hanging jelly mould planters

Angus and Celeste hanging jelly mould planters cream

If anyone can tell me why jelly is traditionally made in the shape of a rabbit, please let me know!


Vintage baby shower

Keeping with the baby theme I wanted to show you some pics of the wonderful baby shower my sister organised for her friend, Helen. The wonderful Katharine, of Peachey Photography, was there to capture the day, and she also arrived laden with cakes and beauteous flowers. A team effort resulted in the most gorgeous spread and a special afternoon full of bubbles, laughter and love…

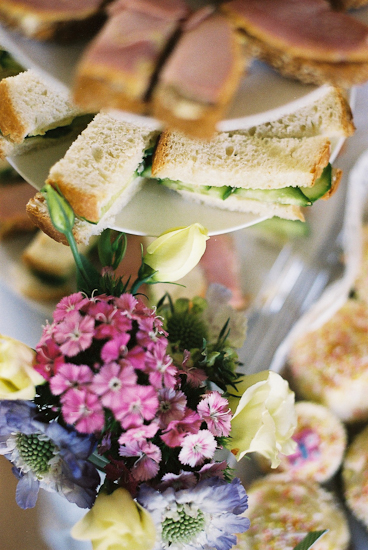
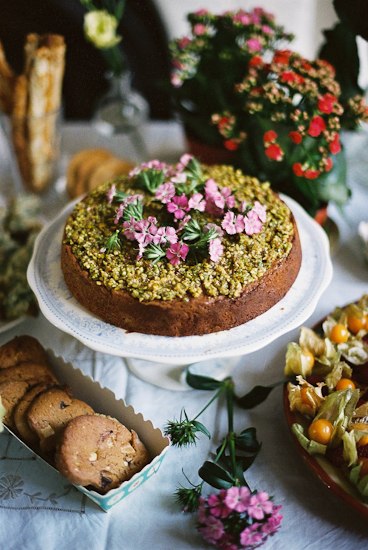
Vintage baby shower table

So pretty! A vintage-inspired spread.

Vintage baby shower party food

Vintage baby shower cake decorated with flowers

A pistachio and lemon cake made by Katharine and decorated with fresh flowers by my own fair hands.

Vintage baby shower Babycham

A kitsch addition of Babycham bottles dotted around the place.

Vintage baby shower nappy cake

A VERY kitsch addition of the traditional American nappy cake that I made. If you haven’t seen one before, it’s made of lots of rolled up nappies with goodies hidden inside.

Vintage baby shower jam jar vase

We used the appropriately named Bonne Maman jars to display the pretty flowers.

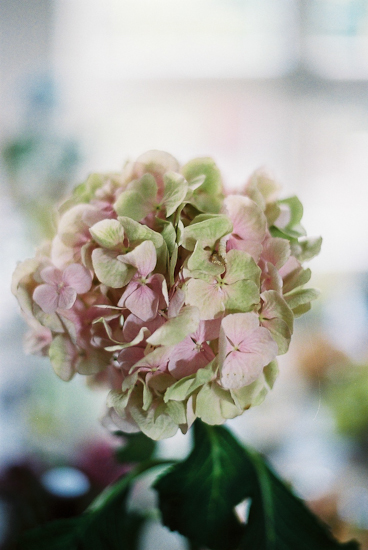
Vintage baby shower hygrangea

Vintage baby shower cake

Vintage baby shower present opening

The beautiful mother-to-be, Helen.

Vintage baby shower presents

An easy way to decorate a room is to fling bunting from one side of the room to the other. Follow my bunting tutorial to make your own.

Vintage baby shower bunting

My little sister, Amy.

Vintage baby shower bunting

My big sister, Juliette.

Vintage baby shower champagne

My mum, Claire, holding the champagne.

Vintage baby shower ring test

The ring test!

Vintage baby shower cake stand

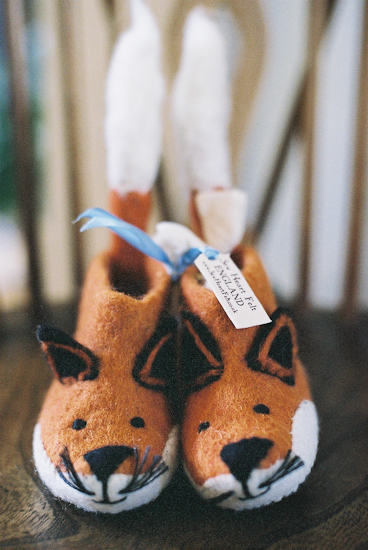
Vintage baby shower fox booties

Surely the best present of the day.

If you want to see more photographs of the day, head over to Peachey Photography’s blog.

Gorgeous friends and family coming together to celebrate, all captured in stunning photographs. A perfect day x