I love stripes

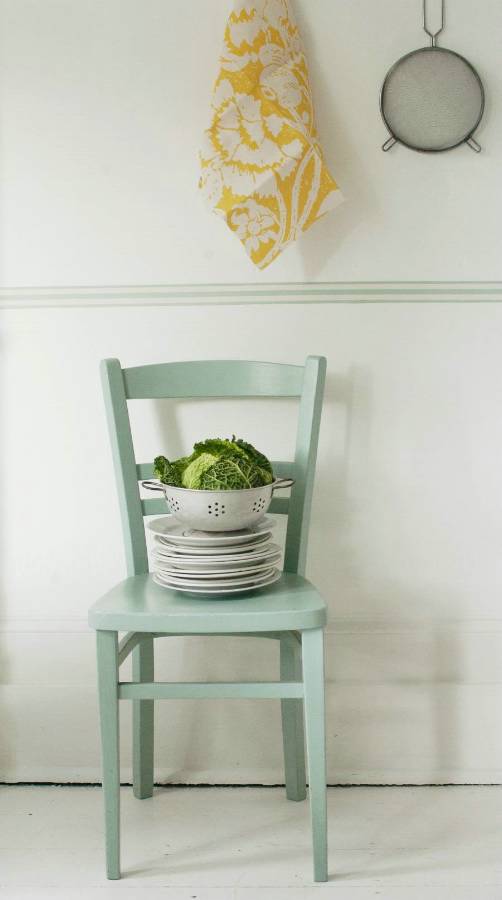
One of my lovely followers introduced me to the wonderful Jane Cumberbatch after I’d featured her home in the post Pale and Interesting. Since then I’ve bought a couple of her interior design books and her sewing book (again, based on the advice of my follower) and I’m totally hooked. Jane’s style is so clean, simple and effortlessly stylish, a breath of fresh air. One of things I have seen on her blog (Pure Style) is a new product she’s designed, which I want to introduce you to: stripy wallpaper border. It is so simple, yet really effective and could transform a room; a million miles away from the twee wallpaper friezes of old. Have a look…

Jane Cumberbatch striped wallpaper border

Cornflower

Jane Cumberbatch striped wallpaper border

Cornflower

Jane Cumberbatch striped wallpaper border

Quince

Jane Cumberbatch striped wallpaper border

Rose petal

Jane Cumberbatch striped wallpaper border

Rose petal

Jane Cumberbatch striped wallpaper border

Cake tin

Jane Cumberbatch striped wallpaper border

Cake tin

Jane Cumberbatch striped wallpaper border

Marmalade

Jane Cumberbatch striped wallpaper border

Marmalade

Jane Cumberbatch striped wallpaper border

Toast

Jane Cumberbatch striped wallpaper border

Toast

Jane Cumberbatch striped wallpaper border

Toast

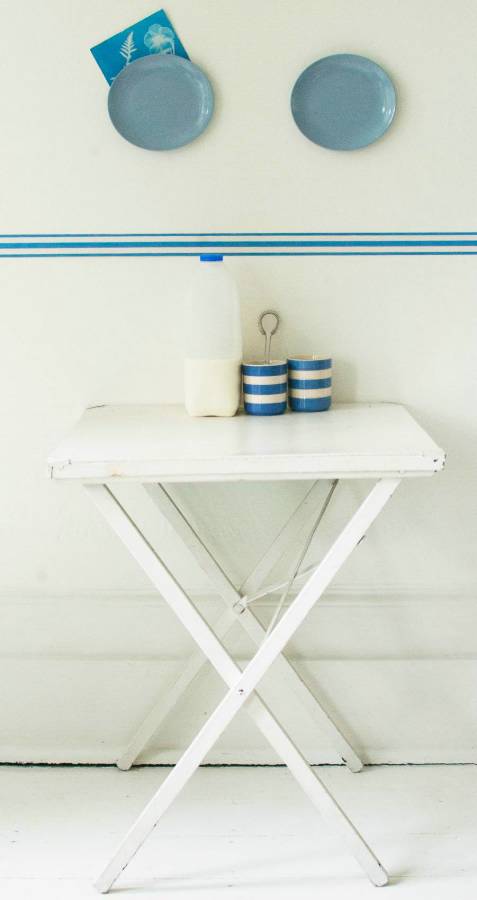
Jane Cumberbatch blue stripy wallpaper border

Duck egg

Jane Cumberbatch striped wallpaper border

Fennel

Jane Cumberbatch striped wallpaper border

Fennel 

Jane Cumberbatch stripy wallpaper border

The wallpaper border is available to buy on Jane’s website Pure Style. What do you think? I might have to give it a go in my hallway, which is a bit dull. But what colour to choose…


Furniture makeover

I have been longing for a lovely bedside table since I moved into my flat three years ago. The problem is I just can’t find one that I like. I’m not prepared to spend money on something that I don’t love, so I’ve made do with a £6 stool from Ikea, that I bought years ago, until I find the bedside table of my dreams (is it weird that I fantasise about bedside tables?!). In the meantime I want to give my little stool a bit of a makeover to make it a bit nicer. I’ve seen a lot of the ‘dipping’ paint technique on Pinterest and I want to give it a go…

Furniture makeover of west Elm side table

Furniture makeover dipped chair legs

Furniture makeover Malmo stool

Dipped table legs

Furniture makeover dipped chair legs

Furniture makeover dipped chair legs

Dipped chair

You will need:

Paint – I used a £3 sample pot from Farrow and Ball, ‘Teresa’s Green’.

Paint brush

Masking tape

Ruler

Tutorial:

Stool makeover with dipped paint effect

1. You can do this paint effect on a stool, chair or table. I have used this Ikea stool.

Stool makeover with dipped paint effect

2. Masking tape all the way round each leg of the stool. Use the ruler to help you place the tape at the same point on each leg.

Stool makeover with dipped paint effect

3. Give the top of the stool and the legs (just to the masking tape) a couple of coats of paint. Make sure you paint over the masking tape so you will end up with a crisp line.

Furniture makeover dipped stool

4. Peel off the masking tape carefully once the paint has dried.

Furniture makeover dipped stool

Done!

Stool makeover with dipped paint effect

My ”new” £6 bedside table.

Furniture makeover dipped stool

I’m now off to clean up lots and lots of puppy poo…I might not be able to resist doing a little post about our new addition, Otto, who we collected last weekend. Too cute for words!


How to plant a terrarium

I AM OBSESSED WITH TERRARIUMS. When we moved into my family home twenty years ago there was a terrarium left in the garden. At the time, I had no idea what it was and it has been in the garden ever since, moulding. Whoops!

I have spent the past year or two begging my mum to give me the terrarium – it has beautiful leading and a felt-covered bottom. She finally caved in as I promised I would plant it for her (she thinks I’m going to give it back but she can dream on! Ha!). I’m really enjoying bringing plants into my home so this was a great opportunity.

If however, you know full well that looking after plants just isn’t for you then why not try this lovely tutorial by one of my favourite crafters, Fran from Fall for DIY. You can learn How to Create Your Own Paper Plants over on the Wayfair site, which are zero maintenance but look great. Either way having plants in the home is such a joy so I would definitely recommend giving it a go.

Back to the terrarium, here’s how I planted it…

You will need:

How to plant a Victorian terrarium

Horticultural charcoal, potting soil, washed gravel or pebbles (optional).

You will need tropical plants that like high humidity, if your terrarium is enclosed. Don’t combine succulents with tropical plants as the one needs a lot of water and the other needs very little. I bought a selection of six tropical plants from Terra World Tropicals for £12.99 or you can buy individual plants from £1.99. It’s nice to have a variety of colours, shapes, textures when you plant a terrarium.

Tropical plant for terrarium Catopsis morreniana (Flowering Bromeliad)

Catopsis Morreniana (Flowering Bromeliad)

Asplenium antiquum 'Crispy Wave' (Tongue Fern)

Asplenium antiquum ‘Crispy Wave’ (Tongue Fern)

Tropical plant for terrarium Syngonium (Arrowhead Vine)

Syngonium (Arrowhead Vine)

Tropical plant for terrarium Coffea arabica (Coffee Plant)

Coffea Arabica (Coffee Plant)

Tropical plant for terrarium Begonia rex (Painted Begonia)

Begonia Rex (Painted Begonia)

Tropical plant for terrarium Mutation of Hemionitis Arifolia

Mutation of Hemionitis Arifolia

Tropical plant for terrarium Cordyline fruticosa (Palm Lily)

Cordyline fruticosa (Palm Lily)

Tropical plant for terrarium Sagina sabulata (Irish Moss)

Sagina sabulata (Irish Moss)

Other tropical plants to look out for are: Pilea involucrata ‘Moon Valley’ Size: To 12 inches tall and wide , Arachnoides simplicior ‘Variegata’ Size: To 16 inches tall and wide, Cryptanthus bivittatus Size: To 6 inches tall and wide, Fittonia verschaffeltii var. argyroneura Size: To 12 inches tall and wide, Peperomia caperata ‘Variegata’ Size: To 6 inches tall and wide, Saxifraga stolonifera Size: To 8 inches tall and 6 inches wide,

Antique Victorian terrarium

A terrarium – mine is an enclosed one but you can use any type of glass container. If you have an open terrarium, don’t choose tropical plants as these need high humidity.

 Tutorial:

How to plant a Victorian terrarium

1. Make sure your terrarium is completely clean. Mine had mould growing in it and all sorts, which you don’t want in a contained environment. Also, you want the glass to be totally clean before you plant it as it will become very difficult to clean once it is planted. Use vinegar to clean the glass and a scourer for the leading – careful not to scratch the glass.

How to plant a Victorian terrarium

2. Layer the bottom of the terrarium with the horticultural charcoal as this provides drainage – I used about an inch. You can not skip this step otherwise your plants will be sitting in water and the roots will rot. At this point you can also add a layer of gravel for drainage and it provides a contrast against the black of the charcoal and soil. However, this is not essential as long as you have the charcoal.

How to plant a Victorian terrarium

3. Add a layer of the potting soil (this type of soil contains more nutrients). I used about an inch.

How to plant a Victorian terrarium

4. Plant each of your plants one at a time. Rest it on top of the soil and then add handfuls of soil around it and make sure it is completely stable and ‘planted in’. Look at the details of each plant to decide where to plant it e.g. if it likes shade, place it in the middle so it will be shaded by the other plants, or if it grows very wide leave enough space around it for growth.

How to plant a Victorian terrarium

5. Pack the soil around each plant. If it’s difficult to get your hand or arm into your terrarium you may need to use tweezers or even chop-sticks!

How to plant a Victorian terrarium

6. I decided to put some washed stones and pebbles between the plants just for decoration. You can also use moss or shells.

How to plant a Victorian terrarium

Finished. I love it!

If you want to make your own you can use any type of glass container like these:

terrariums

One of my favourite terrariums that you can buy (if you’re not lucky enough to find an antique one at the bottom of your garden!) is this from A Rum Fellow:

Terrarium cube

If you buy this it even comes with charcoal and gravel to get you started.

Katy x

Lisa Stickley’s home

When I arrived and caught a peek of the house and Lisa’s beaming smile, I just knew I was in for a treat. Basically, it was my idea of heaven: a hugely talented designer, amazing decor, incredible vintage finds and proper film photography by Katharine Peachey. Dee-lightful.

Lisa Stickley is a designer that I came across because my parents live in South West London, where Lisa had her first shop/studio. It was my introduction to modern, nostalgic prints and vintage-styled ceramics for the home that were hugely popular and stocked in the likes of Liberty of London and Heal’s. Since then, Lisa has moved on to create two new brands, which are inspired by her great grandmothers, Ada Rose, and  her Aunty and Uncle, Betty & Walter.

When I got the opportunity to snoop around Lisa’s new home I immediately knew it was going to be right up my street. And I wasn’t disappointed. All of the care and attention to detail Lisa puts into her designs and styling was evident in her home. Heaven, I tell you.

How did you go about planning your recent renovation? Did you collect ideas and plan each room meticulously or was it more organic than that?

“The bare bones and main décor were pretty well planned ahead with the accessories and bits and pieces for each room collected and gradually added as and when. We were waiting for quite some time to move so I had a lot of months for ‘planning’. Meticulous is probably quite accurate… I downloaded the floor plan from Right Move and started with the flat as a whole in my mind so as to create a complementary eclectic theme throughout. I then worked on planning room by room with individual folders of colour, floor detail, furniture thoughts etc for each. I’m a bit of a planner… don’t do last minute!”

Lisa Levis (nee Stickley) Heal's sofa

Instead of having a wedding list, Lisa and her husband asked for this Heal’s sofa.

Lisa Levis (nee Stickley) original artwork

These pictures were hung in a pop-up shop in Westbourne Grove for the launch of Ada Rose . They are the original line drawings used for the collection.

How has your work as a designer influenced your home?

“It’s all pretty much one and the same, work blurs into the rest of life automatically in everything I do. I’m very lucky to be doing what I love, and I don’t ever really switch off. As a designer I like to surround myself with things that inspire me and my home is no exception. It’s a great place to showcase things I have collected, and experiment with colour, furniture and interesting objects, paintings, bits and pieces that inevitably go on to inspire my work one way or another, be it in a print, a bag shape or styling a shoot.

My husband is a designer too and we love collecting pieces of furniture from our travels, so it has been great moving from a one bedroom flat to a three bed, having to decide what will go where and finally have a home for everything. I think things seem to take on a different lease of life moved around and placed in different environments.”

Lisa Levis (nee Stickley) fireplace

The wall paint is ‘French Grey’ by Little GreeneThe floorboards have been painted with “Chocolate’ and then varnished.

Lisa Levis (nee Stickley) retro chairs

Lisa Levis (nee Stickley) interior design retro armchairs

These chairs were part of Lisa’s parents’ first three piece suite. They went out to buy a loaf of bread and ended up buying these instead – brilliant. They have been re-upholstered many times since.

Lisa Levis (nee Stickley) chair

This chair was one of the pieces designed by Lisa as part of her degree at the Royal College of Art. It’s covered in a vintage table cloth with a copy of a 1970’s Cordon Bleu menu – inspired by the ‘Menu of the week’ in one her mum’s magazines. The framed photograph is by Ben Anders – a porta-loo in Helsinki apparently!

Lisa Levis (nee Stickley) Art Deco vintage chairs

These chairs are waiting to be upholstered although I love them as they are. The artwork is by Lisa’s husband.

How has your style and taste changed over time? 

“It’s hard to say really as I constantly refer back to sketchbooks and things I have collected for years for reference and still find these things incredibly inspiring, I just think you see things with fresh eyes as time goes by. I feel as though my style is a little more grown up these days, as one would expect I suppose. I still love to be surrounded by beautiful things but I am more edited than I used to be, less cluttered. I have noticed that I am becoming more and more attracted to a more pink/ochre/peach colour palette of late too, which is quite a shift for me. Love of particular colours tend to stay with me for quite some time, shifting and adjusting only slightly, so I do feel like I’m entering a bit of a new colour chapter! It’s exciting!”

Lisa Levis (nee Stickley) interior design and styling

Lisa Levis (nee Stickley) interior styling

One of the things I admire the most about Lisa’s overall style is her attention to detail and her ability to style her home so beautifully, yet it looks so organic – there wasn’t a whiff of staging anywhere throughout the house.

Lisa Levis (nee Stickley) hall

Lisa Levis (nee Stickley) interior design vintage kitchen hooks

Lisa Levis (nee Stickley) vintage glass kitchen cabinet

Lisa Levis (nee Stickley) kitchen with decoupaged cupboards

They intend to re-haul their kitchen but in the mean time Lisa has decoupaged the kitchen cupboards with copies of knitwear magazine pages (her husband is a knitwear designer). She used carpet tape and varnish.

Lisa Levis (nee Stickley) kitchen with Ercol dining table and chairs

Lisa Levis (nee Stickley) painted stairway

Lisa Levis (nee Stickley) interior design and styling

Lisa Levis (nee Stickley) interior design and styling

Lisa Levis (nee Stickley) interior design vintage bedroom

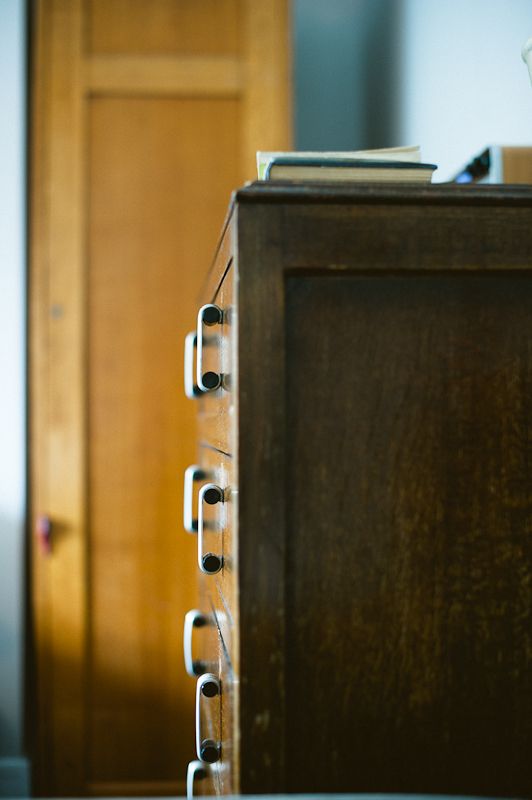
The main bedroom has a set of lockers instead of conventional wardrobe, that Lisa bought in Dorset (it quickly became apparent that she is very good at sourcing beautiful pieces from all over the place).

The chest is Lisa’s grandmother’s and above is a Vernon Ward painting, that Lisa has been collecting, unknowingly, for years. The enamel topped table is from Rye’s McCully and Crane. The bag sitting on the chest is part of the new Ada Rose collection.

Lisa Levis (nee Stickley) bedroom retro chest of drawers

Lisa Levis (nee Stickley) bedroom retro locker wardrobe

Lisa Levis (nee Stickley) vintage bathroom cabinet

The bathroom cabinet was sourced from Kempton antiques market. The toiletry bags are part of the new Ada Rose collection.

What inspired the new Ada Rose and Betty & Walter designs?

“Ada Rose is named after my great grandmothers who lived in a time where style was simply elegant with a blend of common sense and ingenuity. Prints incorporate multi layers of painterly blooms in chic colour palettes, which are unfussy and ladylike with a feminine depth and delicacy, and for me are reminiscent of what they might have worn, then given a fresh modern twist.

Common sense and ingenuity leads on to a level of functionality, which is key to everything I do. I don’t like the thought of designing a beautiful print and simply making in into ‘a bag’. Every detail from the closure pockets, linings and quality leather have been meticulously considered and designed with purpose. Bespoke dyed leather trims frame the prints and snap closures are finished with bold, specially made made acrylic blocks which add an additional dimension to the print. Inspired by traditional shapes, the bags and accessories are brought up to date and designed for modern day use everyday through to evening. All with a well turned out finish, for ladylike style with sophisticated charm.

Betty & Walter is inspired by my Aunty and Uncle who lived in The Bungalow on 5 Elms Road, Oxford. Being mid century cattle dealers for the local farm, most working days were spent at cattle markets and the rest of their time was filled with cooking steak and kidney pie, tending to honeysuckle and harvesting raspberries, going to parties to play matchbottle and newmarket and drinking Camp Coffee!

Uncle Walter often wore chestnut coloured trousers and enjoyed watching the horse racing on a Saturday in his armchair. Aunty Betty had a fondness for marble cake, which she would eat whilst wearing her flowery apron. What better muse(s) could one ask for?!”

Lisa Levis (nee Stickley) vintage luggage doorstop

Quirky details like vintage luggage used as door stops make this home unique.

Lisa Levis (nee Stickley) vintage fireplace

The wallpaper is Designers Guild’s Seraphina graphite print.

Lisa Levis (nee Stickley) vintage fireplace

They got this fireplace for 99p (yes, 99p) from eBay. Jealous.

Lisa Levis (nee Stickley) bedroom retro sideboard

Lisa Levis (nee Stickley) Designer's Guild wallpaper

Lisa Levis (nee Stickley) 1930's wardrobe and magazines

What a beautiful home, caught on beautiful film, courtesy of the beautiful Katharine Peachey.

As I paw my way through the new Ada Rose and Betty & Walter collections, ogling new prints and patterns, coveting elegant handbags and glamorous scarves, I have a suspicion that exciting times are ahead for Lisa Stickley…(oh, and I want to come back if you ever get your hands on the bottom half of the house!)
Paint effects

My next post is a very exciting one. I went to meet the designer Lisa Levis (nee Stickley) with the wonderful Katharine Peachey of Peachey Photography. We chatted design and snooped around her amazing pad and Katharine took beautiful photographs (seriously, don’t miss the post – such a beautiful home and great design ideas). One of the things I noticed about her home was her use of paint to transform a room. She has used a beautiful grey from Little Greene set against brilliant white. This combination provides a basis for all of her wonderful furniture and antique finds to shine.

When I was 11 years old I painted my bedroom. From that point onwards, I painted it a different colour every year and so began my love of interiors.The first time I painted it I chose peach for the walls, with a paler peach sponged on top – amazing!

There was a time when paint effects were all the rage and then very quickly they became synonymous with bad taste. Now, it seems that using paint as a design statement is becoming more common again. This is good for three reasons: it’s cheap, easy and you can be as creative as you like. Anyone can paint a room, with a bit of patience and effort, and it costs relatively little to totally transform a space and the possibilities are endless. All you need is a bit of inspiration…

Farrow and Ball paint effect

Extending the ceiling paint further than you would expect and using a different tone on the door makes this effect very interesting (Farrow and Ball).

Paint effect

Black tear drop effect on brilliant white is very striking.

Farrow and Ball paint effect

Using unconventional colour combinations can totally transform a room (Farrow and Ball).

Farrow and Ball paint effect

Paint a room white and then using daring colours for the ceiling and woodwork, combined with painted furniture (Farrow and Ball).

Polka dot paint effect

Classic polka dots, painted in a random pattern, looks very stylish.

Farrow and Ball paint

Use a completely different colour for your woodwork (Farrow and Ball).

Pink wall and pink sofa

Tone your paint in with your furniture. This is so pretty.

Walls and wood work painted the same colour

For a sense of continuity use the same colour for the walls and all the woodwork.

Grey painted wall

Use a colour to paint a half way up the wall.

Painted door

Daring door.

Paint half a wall

Paint half way up the wall and door. Love this.

Neon paint on skirting board

Use an unexpected colour in a very restricted way by carefully painting only the top of all the skirting boards.

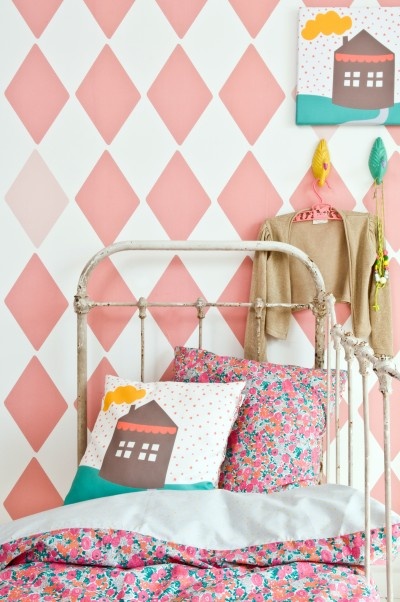
Pink diamond paint effect in child's nursery

Diamond effect.

Painted woodwork

This is a very classic look – paint the walls a neutral colour and then highlight all the woodwork with a different colour. If you do this throughout the house it can create a lovely flow between rooms.

Painted yellow front door

Use a striking colour just for a door.

Duck egg woodwork

A subtle nod to colour, picking out some of the woodwork.

Creeping yellow paint effect

Creeping yellow.

See anything you like? If you’ve done anything similar in your home, please send me a pic!

Don’t miss the post featuring an interview with Lisa Levis and beautiful photographs of her super-stylish house!