Double Merrick

On a road trip round France last summer we caught up with a friend in La Croisille-sur-Briance, a tiny village nestled deep in the Limousin region. Merrick Angle is an illustrator and designer who is both halves of Double Merrick (the name was coined by his daughter, Flora, who, when asked what could be better than Merrick, replied “double Merrick!”). My next post will showcase some of his beautiful prints, canvases and homewares, but first I want to show you his stunning, ivy-covered, family home. Having arrived at the house during the hottest part of the day, – we stepped out of the glaring sun and into cool shade provided by the house’s two-foot-thick stone walls. A unique home opened up before us: filled with vintage finds, antique furniture and an organic feel that can only evolve in a real home. One of the things I love most about the design of the house is that it doesn’t follow any rules; Merrick and his wife Alice have combined furniture from different periods with colours and fabrics, photographs, knick knacks and a lobster on a piano. This is what he told me:

“In 2004 we bought a wreck. The house hadn’t been lived in for 30 plus years, had no hot water and one socket for the whole house. It was February! On top of this we had no money, so work was a slow business. This in someways has been a blessing, as it forced us to live with the house and really think about how we used it before we could do any major work.  Mainly, we have just decorated and done very little structural work (just rewired the house and put in a kitchen and a bathroom). Most of our furniture are things Alice has come across in her work as an estate agent or finds from brocantes and car boot sales.”

I asked Merrick, from a designer’s point of view, what advice he has about using colour, as this is something that I always struggle with:

“Push your boundaries. We all start off from a small space of what we consider ‘right’ and acceptable. And it is a small space! I started out wanting to paint every room in our house a bold, strong colour but through Alice’s (my wife) influence I have learnt a lot about nuance and tone. I think you have to be receptive to new ideas.”

Delight in these pictures of Merrick’s and Alice’s home and their unique style. I will introduce you to Merrick’s work in my next post…

Home of Double Merrick | French house | Apartment Apothecary

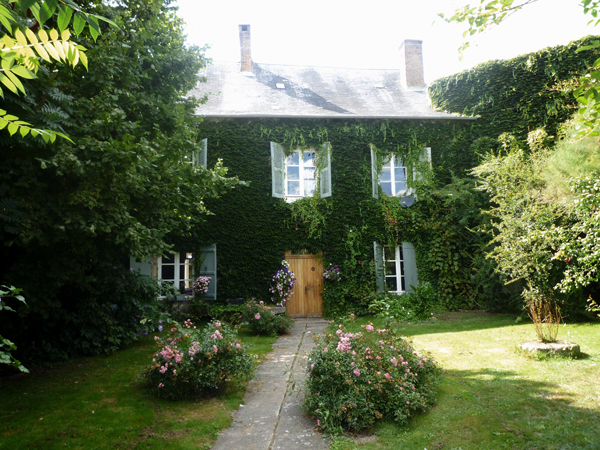
The pretty and traditional style of the outside belies the unique interior style of this home.

Home of Double Merrick | French house | Apartment Apothecary

Home of Double Merrick | French house | Apartment Apothecary

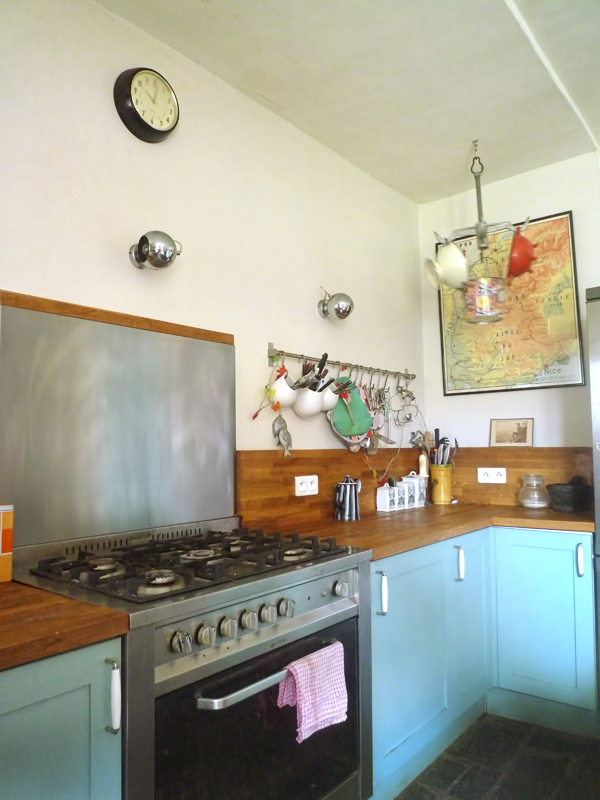
Kitchens can too often feel clinical and characterless but here the simple addition of the photographs give another dimension to this space.

Home of Double Merrick | French house | Apartment Apothecary

I’m just not sure what to say about this stove other than give it to me! Love the French signage too.
Home of Double Merrick | French house | Apartment Apothecary

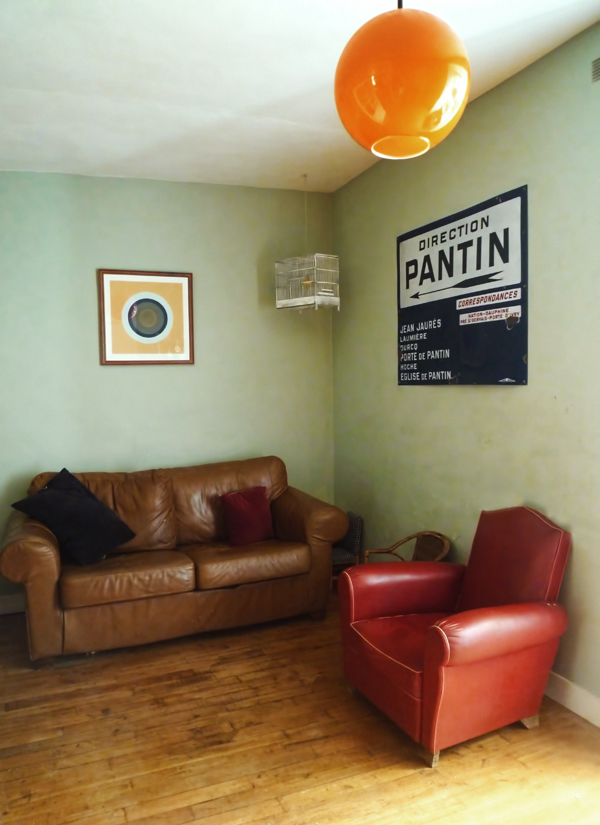
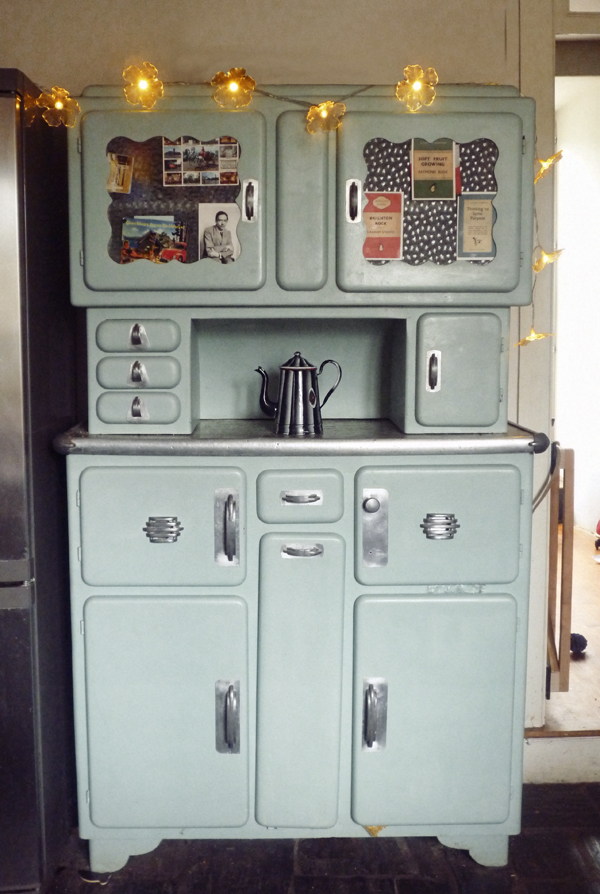
A 1950s cabinet adds another layer of interest to this kitchen. The mix of old, really old and new makes this room interesting and exciting.

Home of Double Merrick | French house | Apartment Apothecary

A gorgeous, traditional window seat is a reminder of the age of the building and shows off the incredibly thick walls.

Home of Double Merrick | French house | Apartment Apothecary

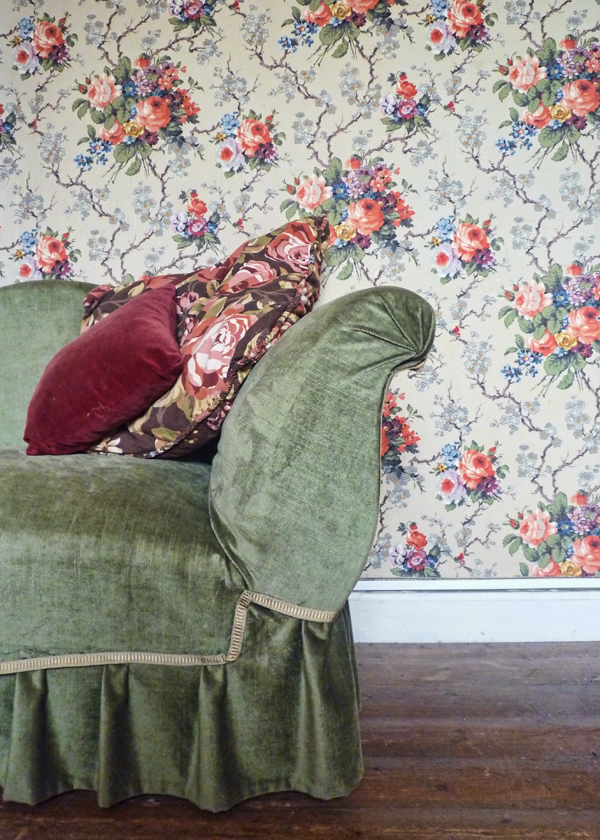
Original wallpaper that they were able to save on one wall of the bedroom.

Home of Double Merrick | French house | Apartment Apothecary

Home of Double Merrick | French house | Apartment Apothecary

Home of Double Merrick | French house | Apartment Apothecary

Home of Double Merrick | French house | Apartment Apothecary

I told you there was a lobster and piano.

Home of Double Merrick | French house | Apartment Apothecary

Home of Double Merrick | French house | Apartment Apothecary

Home of Double Merrick | French house | Apartment Apothecary

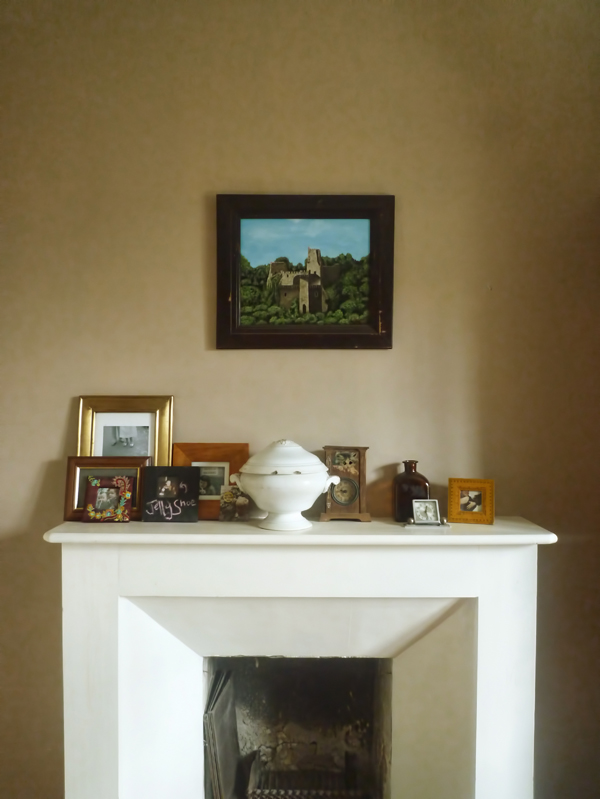
All of the period fireplaces are strong and simple and give structure to each room.

Home of Double Merrick | French house | Apartment Apothecary

Home of Double Merrick | French house | Apartment Apothecary

Home of Double Merrick | French house | Apartment Apothecary

I love bathrooms that are a feature and point of interest rather than being purely functional.

Home of Double Merrick | French house | Apartment Apothecary

Amazing vintage barber’s chair in the bathroom.

Home of Double Merrick | French house | Apartment Apothecary

Home of Double Merrick | French house | Apartment Apothecary

What I would do for a shutter or two in my life!

Jealous much?

Katy x

Photographs taken by Merrick Angle.
What to do with vintage finds

I prefer a mix of new, vintage and antique finds in my home. I think it’s hard to create a sense of self and personality in a home if everything is brand new as nothing represents your childhood and younger adult years. I think a home should reflect the people who live in it and this involves keeping or collecting what you’re interested in, what you love the look of, or what has a story behind it; Ikea comes flat-packed, memories not included.

The problem comes when you begin to run out of space.  Antiques are usually so precious and expensive we don’t have too many of them so they don’t prove a problem.  New objects are usually bought for practical purposes.  It’s the vintage objects (post-1960s) that can begin to clutter up our lives as they can be collected easily and are relatively inexpensive. However, vintage objects don’t always have a practical use so seem to ‘hang around’ more than anything else and people can get scared to use them because they are ‘old’.

I would like to show you some examples of how to use vintage finds in a practical way so that they don’t become clutter but turn into interesting conversation pieces, characterful storage and practical pieces of beauty that will add a unique feel to your home. Don’t rush out and buy something made for purpose; recycle and re-use what you have in a creative way and don’t be scared to use it instead of just staring at it!

Retro vintage G-Plan sideboard and Ercol chair

We needed a TV unit for our ENORMOUS (don’t get me started!) TV. Instead of buying a made for purpose AV unit, which are typically pretty disgusting, in my opinion, we turned this 1950’s G-Plan sideboard into the perfect, stylish TV cupboard (filled with horrible electrical boxes).

Vintage blue and white tiles

I absolutely love these blue and white tiles that my friend Agnes bought me in Buenos Aires. I use them as coasters or on the kitchen table for hot pans.

Blue and white vintage enamel

This blue and white enamel pie dish used to belong to my grandfather and he used it in the bathroom for his soap. I use it for make-up and every time I see it I think of my grandfather so what better reason to re-use this rather than buying a new make-up box.

Vintage crates

I salvaged these crates from an orchard whilst on a school trip. They sit on my balcony and keep the pots off the decking to decrease the chance of mould. I love the vintage feel they give to the balcony as well as serving an important purpose. Photograph by Peachey Photography.

Vintage glass jelly mould

A vintage jelly mould, given to me by my friend Farah, that I use for my cotton reels.

vintage ashtray

This vintage ashtray hangs on my mug hooks in the kitchen and holds garlic cloves.

Vintage Burleigh jug

Instead of buying a brand new utensil holder use a pretty vintage jug, which will add character to your kitchen.

Vintage shabby chic children's chair

Instead of buying a step-stool for high cupboards and shelves I have re-purposed a vintage children’s chair.

Moroccan tiles

I use these Moroccan tiles in a very practical way: I rest my hair straighteners on them.

Vintage metal basket

Instead of a boring loo roll holder I’ve used this vintage electrical wire basket to hold loo roll and books in the bathroom, which is more interesting to look at.

Vintage mustard jar

A mustard jar is re-purposed to make a brush pot.

Use vintage bottles to hold single stems.

Antique iron

I use this iron as a very effective doorstop or it would make a perfect bookend.

Vintage tea cup

I love vintage crockery but it can be easy to buy too much and it ends up sitting in a cupboard not being used. We use one of my favourite tea cups for keys on the hallway table so we can see it and it serves a purpose.

Vintage Burleigh pottery jug Asiatic Pheasants

Don’t just stare at your vintage jug, use it as a vase.

Vintage school trunk

I did a previous post about how I up-cycled my mum’s Old School Trunk, rather than buying a brand new coffee table. Photograph by Peachey Photography.


Have a look around your home and see if there is anything you have been hanging onto that could eventually serve a purpose and make your home more beautiful at the same time. x


Liberty print cot tidy

Did anyone see the Great British Sewing Bee last night? I’m very excited about it and feel full of motivation to push my new hobby further (especially as Patrick Grant is involved!). So, I have a new sewing project to share today…

This project is in honour of my friend Betty and her baby bump.  I am making a present for her baby shower and if you are wondering what a cot tidy is, it’s an excuse for me to indulge my addiction to Liberty fabric and make something delightful for my wonderful friend (and hopefully she’ll find it useful too!).

You will need:

1. Lightweight cotton fabric: Two 47cm x 38cm pieces for the back and front, two 46cm x 28cm pieces for the pocket and sixteen 4cm x 20cm strips for the four handles (or use ribbon as this is the bit that takes the longest). I’ve used Phoebe and Poppy and Daisy prints from Liberty.

2. Medium weight interfacing – It can be ironed on to your fabric to make it stiffer and gives it shape and form. I bought it from John Lewis. You will need exactly the same amount of interfacing as material.

3. 50cm of double folded 25mm bias binding, which I bought from John Lewis.

4. Sewing machine, fabric scissors and/or cutting board and rotary cutter, pins, chalk, cotton, needle, button hole foot for sewing machine.

5. Self cover buttons that you can buy from Sew Over It.

Tutorial

a) Cutting your pattern:

Liberty fabric cot tidy

1. Press your material.

Liberty fabric cot tidy

2. Cut your pieces of interfacing, using scissors or a rotary cutter: Two 47cm x 38cm pieces for the back and front, two 46cm x 28cm pieces for the pocket and sixteen 4cm x 20cm strips for the four handles. These will act as your pattern.

Liberty fabric cot tidy

3. Place your interfacing pieces onto the wrong side of your fabric, one at a time, and iron on (using the instructions in the packet). Cut each piece out either with scissors or a rotary cutter on a cutting board.

b) Make and bind the pocket:

Liberty fabric cot tidy

4. Pin three sides of your two pocket pieces together, right sides together (interfacing facing outwards), leaving the bottom open.

Liberty fabric cot tidy

5. Sew the sides and the top of the pocket together leaving one long side (which will be the bottom) open.

Liberty fabric cot tidy

6. Turn your pocket inside out. I have used a different fabric for the inside and outside of the pocket.

Liberty fabric cot tidy

7. Unfold one side of your binding and line the top edge with the edge of the top of your pocket (this is the sewn, neat edge of your pocket.)

Liberty fabric cot tidy.

8. Sew along the first crease of the binding.

www.peacheyphotography.co.uk

9. Fold the binding over the edge of your pocket and press and pin it.

Liberty cot tidy

10. Now, sew the binding on the top side of the pocket so that it catches the back of the binding on the back of the pocket.

c) Attaching the pocket to the front piece of the cot tidy:

Liberty cot tidy

11. Pin your pocket to the front piece of your cot tidy (the back piece should be set aside still), leaving at least an inch either side to allow for a seam allowance and to give your pocket some volume.

Liberty cot tidy

12. Pin the bottom corners of the pockets carefully to pinch in the volume of the pocket.

Liberty cot tidy

13. Divide your pocket in half and draw a straight line top to bottom with tailors’ chalk.

Liberty cot tidy

14. Sew a couple of lines of topstitch up the centre of the pocket to divide it into two. Now set this piece aside.

d) Making the tabs to attach the cot tidy to the bar of the cot:

Liberty cot tidy

15. Sew the right sides of each tab together, with as little seam allowance as possible.  There are eight of these to do so patience is needed!

Liberty print cot tidy sewing tutorial

16. Turn each tab outside in using a pencil to push it out.

e) Putting all the pieces together:

Liberty print cot tidy sewing tutorial

17. Press a 1cm seam on the back piece of your cot tidy but don’t sew it yet.

Liberty print cot tidy sewing tutorial

18. Sew each tab on the wrong side of the back piece, with the pressed seam. Use thread in your bobbin that you want to be seen on the back of your cot tidy.

Liberty print cot tidy sewing tutorial

19. It should look like this once you’ve sewn all the tabs on.

Liberty print cot tidy sewing tutorial

20. Press a 0.5cm seam along the front piece of the cot tidy. Now, pin the front of the cot tidy (with the pocket already attached to it) wrong side out to the back of the cot tidy, which should also be be wrong side out.

Liberty print cot tidy sewing tutorial

21. Sew along both sides and bottom of the cot tidy. Leave the top, where the tabs are, open so you can turn it inside out.

Liberty print cot tidy sewing tutorial

22. Sew topstitch along the top of the cot tidy, securing the tabs in place and leaving a neat edge.

f) Making the buttons:

Liberty fabric cot tidy

23. Place the top side of the button on the wrong side of the fabric, draw round it and then cut out leaving 1cm all the way round.

Making Liberty fabric covered buttons

24. Do a running stitch round the outside of the circle and leave the two ends of the threads poking out.

Making Liberty fabric covered buttons

25. Place the top side of the button inside the fabric and pull the two ends of the thread tight so the fabric gathers in and then push the bottom side of the button in.

Liberty print self covered butons

26. Pop the back on the button.

Making Liberty fabric covered buttons

27. Perhaps the most satisfying bit of the whole process!

Liberty print cot tidy sewing tutorial

28. Using a button hole foot on your sewing machine make a button hole on your front tabs and sew on your fabric covered buttons to your back tabs. Then, you’re done!

Liberty print cot tidy sewing tutorial

The back.

Liberty print cot tidy sewing tutorial

The front.

Liberty fabric cot tidy

Inside the pockets is the contrasting fabric.

Liberty fabric cot tidy

Its purpose is to hang over the side of a cot to hold books, toys, rattles whilst baby sleeps.

Liberty print cot tidy sewing tutorial

Maisie the mouse is not included, I’m afraid!

Happy baby shower, Betty, and happy sewing everyone else!

Katy x


Easter bunting and egg hunting

So, are we all over bunting yet? I know it’s quite twee and it’s been done to death but you can’t get away from the fact that it is pretty and brightens up a party or the garden. Just sayin’.

One of my friends, Thomasina, made a huge length of bunting quite a few years ago and whenever a big event is planned it is always rolled out: a couple of weddings, a 60th birthday, a couple of 30th birthday parties, including my own, and so on. It even travelled to Edinburgh for an event and everyone’s hearts stopped when it temporarily went missing in the post on its way back (not sure if Thomasina knows about that bit). I decided to make some, quite a lot actually as it’s so much cheaper to make compared to buying it, and three people have already asked if they can borrow it for their weddings. Therefore, I’ve done a little tutorial in case you, too, want to make your own for this summer’s party, wedding, children’s birthday etc.

I made 20 metres of bunting and this cost me about £10 in cheap cotton and the binding. I’ve had a look around and my £10 wouldn’t get much more than 2 metres in the shops (crazy!) so well worth making your own if you have a sewing machine (or a lot of time and patience if you want to do it by hand). This is the perfect project if you have only recently taken up sewing, like me, as you can practice pattern cutting, pinning, sewing in a straight line, top-stitching and binding and if you get anyhting wrong it really doesn’t matter as once it is flapping in the wind, hanging at a height, who is going to notice any mistakes?

You will need:

1) Lightweight fabric of your choice (it doesn’t even have to be 100% cotton, as you can’t really tell the difference when it’s hung at a height).

2) Thread, pins, scissors, sewing machine.

3) 25mm cotton binding (in whatever colour you like) bought from eBay. This is sold in different lengths – I bought two 10m lengths for £2.80.

Tutorial:

Bunting

1. For each flag you need a pair of identical triangles (well, as identical as you can get them – mine are distinctly wonky). Mine measure 10 cm long and 8cm wide.

Bunting

2. Cut out lots of pairs of triangles according to what length you plan your bunting to be. I decided to use three different prints but you can use all your old scraps or go completely plain – up to you.

Bunting

3. Pin the triangles right sides together, leaving the top open.

Bunting tutorial

4. Sew the triangles together, leaving the top of the triangle open. Leave a 0.5cm seam allowance.

Bunting tutorial

5. Snip the end of the triangle off (the seam allowance – don’t cut through the stitching) so that when you turn it inside out it can be pressed flat.

Bunting tutorial

6. Turn the triangle inside out using a pencil to push the tip of the triangle out.

Bunting tutorial

7. Press the flag once it is turned inside out. I then decide to do a top-stitch just for decoration, and practice as much as anything, but this is not necessary.

Bunting tutorial

8. Press the binding in half. You will need to sew along the whole length of the binding adding a flag every 8cm (just fold and pin the binding over the top of the flag).

Bunting tutorial

The finished article.

Easter egg hunt

The bunting was supposed to be the garden decoration for our mammoth family Easter egg hunt in Devon (28 of us this year) but I’ve got a feeling it’s not going to be garden weather, somehow. Oh well…

Have a lovely Easter weekend, whatever you have planned xx


Plant markers

So, the weather has been seriously vile. Snowing in late March? Really?! This time last year I was sunbathing next to an outdoor pool in Devon (I know that isn’t particularly glamorous, but I’m just trying to make the point that it was hot enough to do so).

London roof terrace

Our roof terrace as it looked at the weekend. Lovely!

Anyhoo…the reason I’m discussing the weather is that the seeds I planted a few weeks ago during my sowing seeds tutorial will be ready to plant outside soon, when the weather improves. I need to make some plant markers so I can keep track of what I plant and where, so I have decided to make my own, as I promised, to help save money. You can buy really pretty plant markers but is that really what you want to spend your money on? Much better to recycle and re-use, especially as they will be outside and barely noticeable.

Have a look at my different ideas:

Blackboard plant pot for basil

1. This would work particularly well if you have pots of herbs indoors. Spray the pots with chalkboard spray paint, write the names of the herbs on the pots, which can be changed whenever you like. This way you will never have that embarrassing moment, when asked to fetch a handful of herbs, of not knowing which one is which!

Cork plant marker

2. Slice the side off a cork so you have a flat writing surface. Stick the cork on a BBQ stick, done! Recycle, recycle, recycle!

Twig plant marker

3. Use a vegetable peeler to peel the bark off the end of a twig and add the name of the plant.

Blackboard wooden spoon plant marker

4. Blackboard paint again, this time on an old wooden spoon for bigger plants or a crop of vegetables etc. Easily re-useable as you just rub off the chalk and add the name of a new plant.

Blackboard wooden spoon plant marker

I’ve used this spoon to mark the wild flowers we have planted on our roof terrace. We have planted them in planting bags, rather then the beds, because they can get out of control, especially poppies. They will attract butterflies and bees to our roof to help pollenate the other plants.

Covered jar plant marker for wild flowers

5. If you need to keep the information on your seed packets or plant label then pop it into a jar. Make a slit in the packet at the bottom and then hang it on a stake.

Covered jar plant marker for wild flowers

This protects your seed packet so you can refer back to instructions or care tips.


I will show you how my seedlings are getting on in the next couple of weeks, hopefully they will be ready to plant out soon.  In the meantime, I will do a post next week about different containers you can recycle and use instead of buying plant pots.

Happy gardening! x

Follower updates:

One of my lovely followers, Evelyn, sent in pics of her beautiful children trying the chalkboard plant pot idea. Kept them busy for hours apparently!

Here’s William making his pot.

Tamara doing a great job using multi-coloured chalk. Love it!