I can honestly say that my ‘new’ kitchen looks and feels like a totally new space compared to before. We didn’t have the budget to make drastic changes and we had to do everything ourselves but a few subtle changes have made a big difference.

Our kitchen cupboards were fine so we kept a lot of them but just by removing a few of the wall cupboards made the space feel instantly bigger and quite a few friends have asked whether we moved a wall to make the room larger so that’s a good sign of success. By painting the walls Pink Ground, adding leather door handles, metro tiles, a solid beech worktop, a quartz sink and a couple of open shelves I feel much more at home in this kitchen and it works a lot better on a practical level, too.
Here’s a bit more detail of the changes we made…

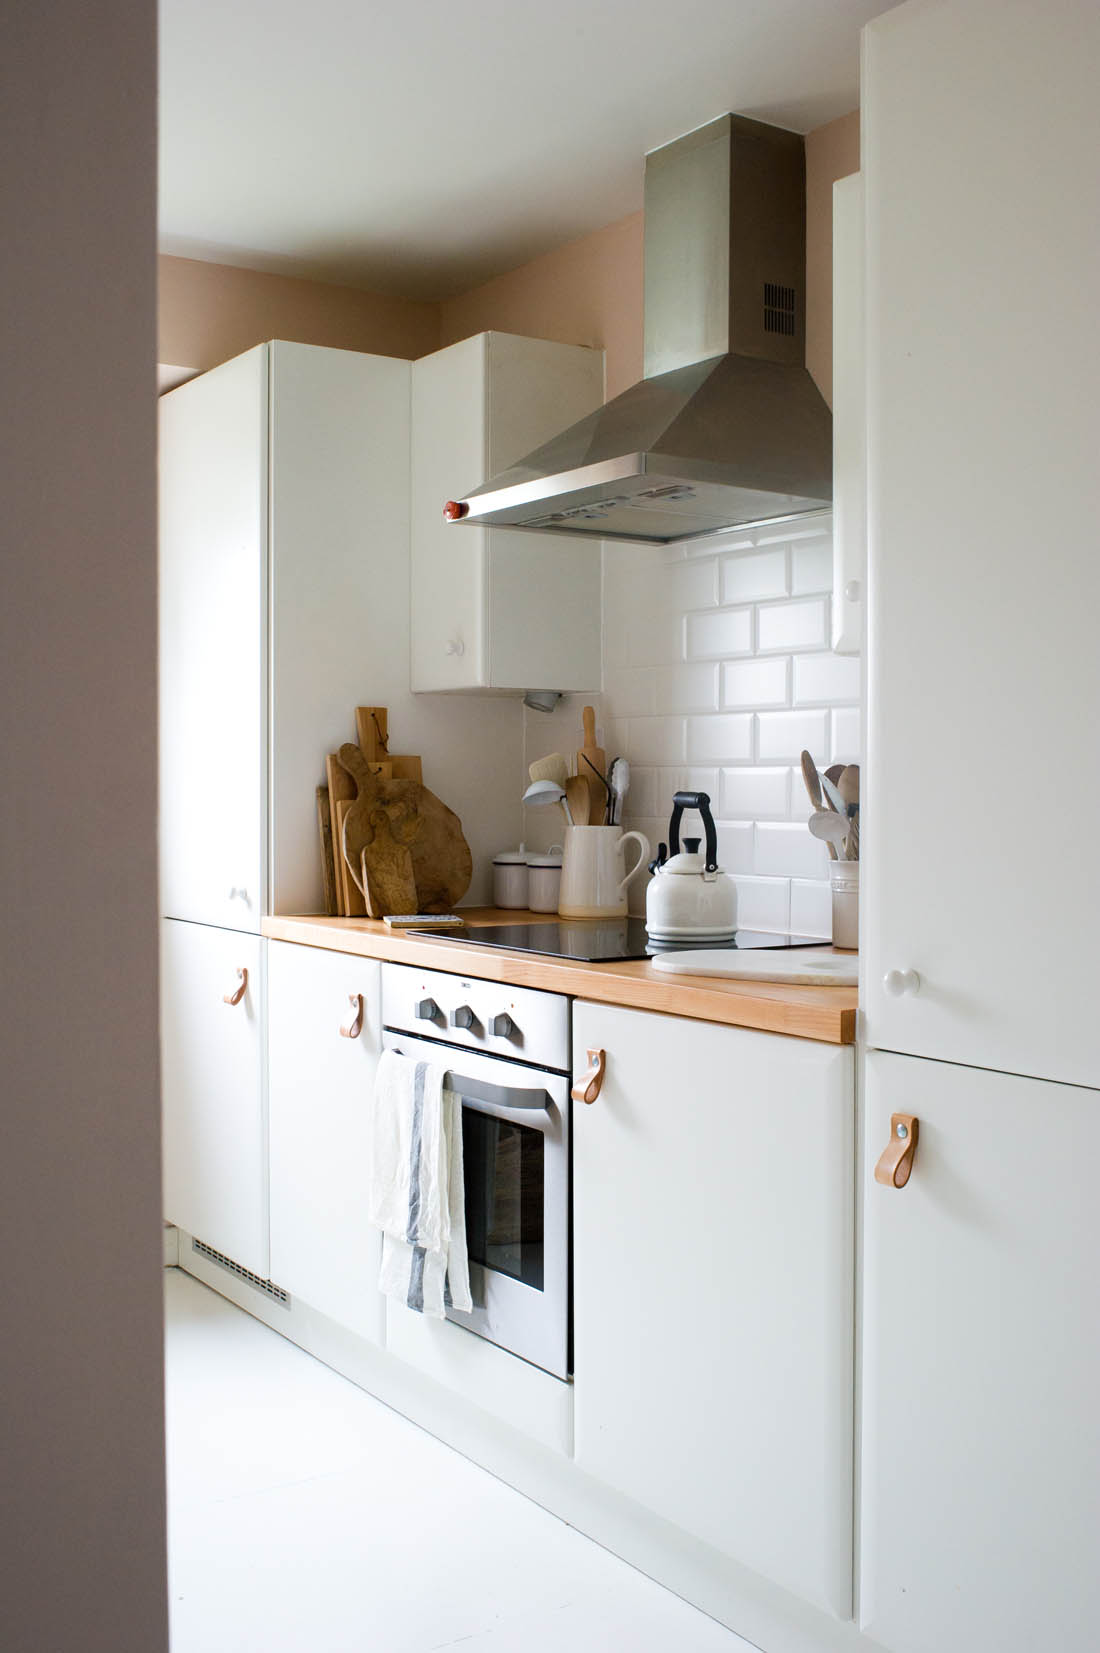
I removed the stainless steel splash back from behind the hob and replaced it with matt white metro tiles from Tile Giant. I added leather handles to the bottom cupboards and ceramic white knobs to the top cupboards (I didn’t want the leather handles to be overpowering). The worktop on this side of the kitchen was also replaced with solid beech.
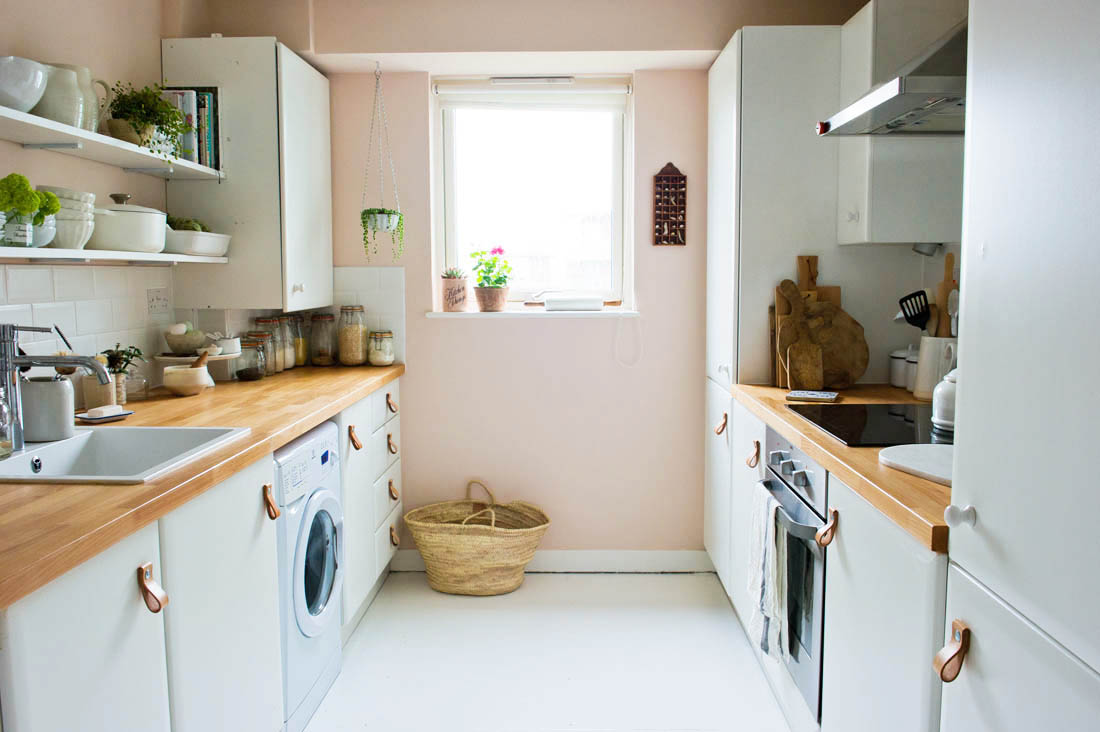
The right side of the kitchen above has remained the same in structure but the new solid wood worktop and metro tiles have lightened and brightened this side of the kitchen.
In an ideal world I would have removed all the wall cupboards on the left side of the kitchen but the boiler is in that end cupboard so it had to stay.

The left hand side of the kitchen is now a lot more open. The Pink Ground wall paint has added warmth and the white painted floor makes it look a lot more contemporary and bright (it used to be dark faux wood vinyl).
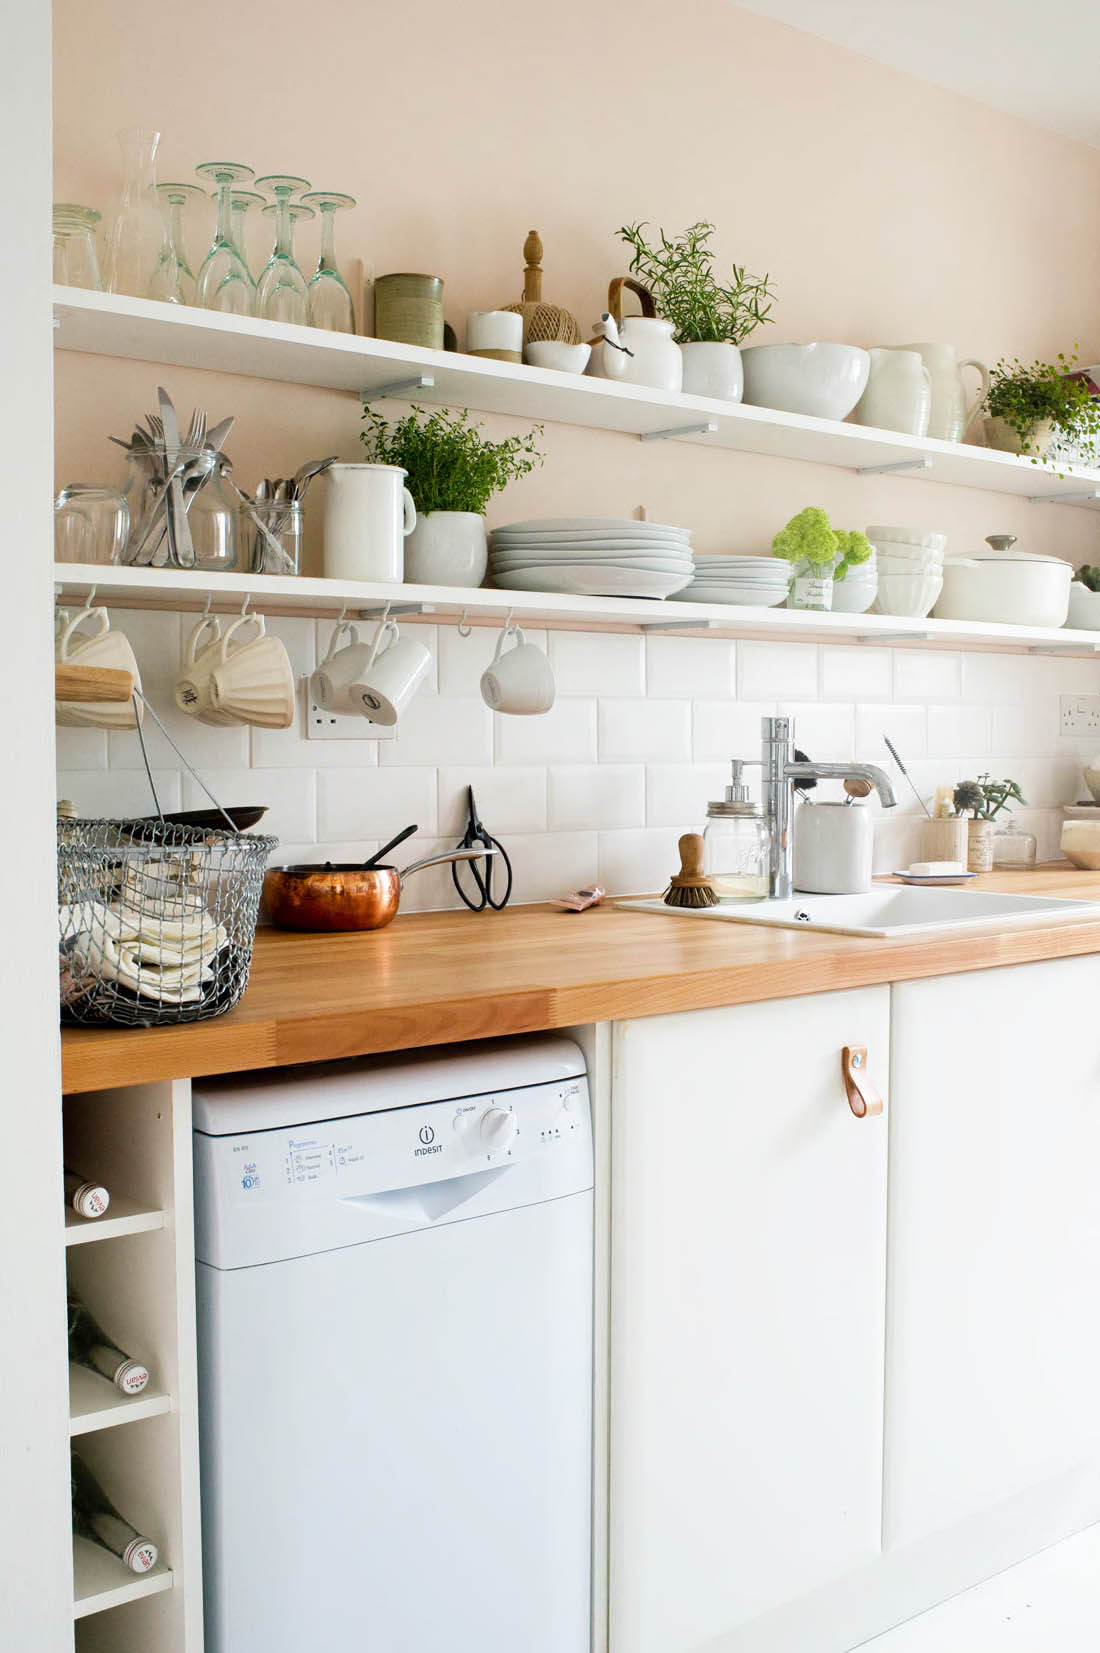
The open shelves are my favourite addition to the kitchen. The space feels a lot more open without the wall cupboards and to help retain that feeling of space and light everything on the shelves is white, which creates a nice unified look. Plants dotted around the shelves help to adda bit of contrast and interest.

I love being able to display all my white crockery and my cotton white Le Creuset pans.
Jules came up with the clever idea of mounting the shelf brackets upside down, creating a notch in the back of the shelf so that they sit flush to the wall. This way the vertical strut can’t really be seen as I painted them the same colour as the wall and the objects on the shelves cover them. We bought lengths of pine (8.5 inch wide, 1 inch thick) from the timber yard for the shelves that I painted white and we spaced the brackets 50cm apart . So far they are holding up brilliantly.

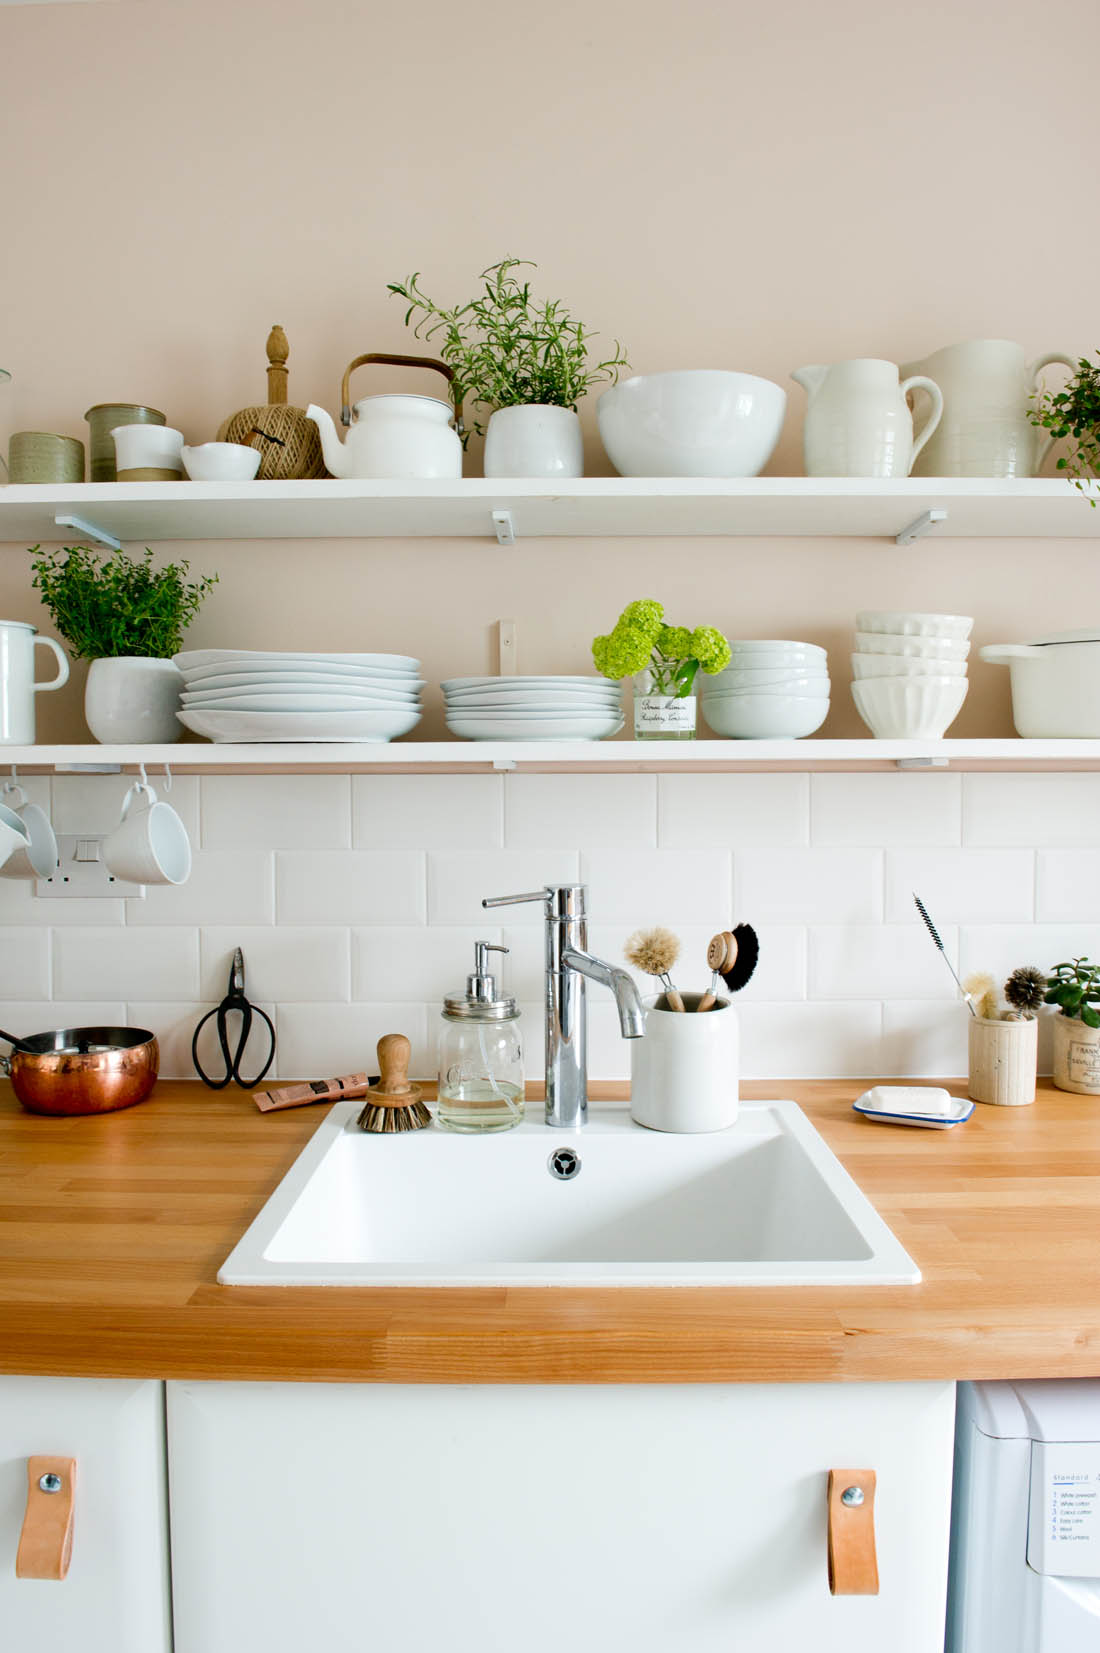
The new sink ties together the white cupboards, tiles and shelves and the wall colour, work top and leather handles tone in well with each other too.
I am so please that I suddenly woke up one morning and decided we needed to have a white sink as it looks so much better than the stainless steel one we had. It is also so much easier to keep clean although this model doesn’t have a draining board, which wouldn’t suit everyone. As it is just the two of us and we have a dish washer we tend not to do much washing up so I decided to save the space on an inbuilt draining board. I have a small cutlery drainer that sits in the corner of the sink and if we do wash up something large I just pop a tea towel down on the worktop and place it on that or dry it up immediately. I like the combination of the white sink and white metro tiles.
I did a massive decluttering spree before we did the kitchen and got rid of loads of unnecessary kitchen stuff. I chose the crockery and cutlery that we use on a daily basis to place on the first shelf and then glassware and a few bits of pottery that we use less often on the top shelf. Everything is within arm’s reach so no step stool is needed. We hung mugs below the bottom shelf to save space and for ease of access.
There used to be a full height cupboard at the entrance to the kitchen but removing that made the biggest difference to the feel of the kitchen. Without that cupboard we could lengthen the worktop and place the dishwasher underneath it and there was enough space for Jules to build a bottle holder in the gap that was left.

As you entered the kitchen from this side you were faced with a full height cupboard and a horrible metal wine rack. Both of those things have gone so the room feels bigger and wider.
At the other end of the kitchen there used to be a radiator, which prevented us from making the most of this passageway from the hallway that leads into he living room. We decided to remove the radiator altogether (we live in a very well insulated new build so we definitely won’t miss it) and that way we could mount these BESTA cupboards from Ikea. This has worked amazingly well – and everyone has commented on it – as it extends the living space and helps to connect the living room with the kitchen. It makes the absolute most of the space but doesn’t make it feel smaller because they are so sleek and float above the floor.
The new cabinets lead into the living room (you can just see the corner of it on the right). To see my living room makeover take a look over here.
It was worth the hard slog in the end and we are both enjoying the kitchen so much more than I thought possible. I hope Ive proved with a small budget and a bit of hard work you can make a big difference to a room.
Katy x
*All photography by Katharine Peachey.
Sources:
Paint – Pink Ground c/o Farrow & Ball
Tiles – matt metro tiles c/o Tile Giant
Worktop – solid beech worktop custom made from Ikea
Sink – quartz sink from Ikea
Door handles – leather handles made by me on the bottom cupboards and ceramic handles from John Lewis on the wall cupboards
Sideboard – BESTA cabinets from Ikea


It looks fantastic – happy cooking in it! LOVE those Besta cupboards…
looks totally gorgeous!! All your hard work paid off! xx
Bah!!! I LOVE it!!!!! Adore it all, please could you come and makeover ours?!!!! The decluttering resonated so much, I have boxes of stuff I’ve hoarded that never gets used. Right this weekend is clear out time. Beautiful space lady xxx
Looks lovely! Particularly the open shelves, although I still think that you are brave (I am not neat and tidy enough).
Oh that colour! Looks a bit like setting plaster (I know they sell a paint that colour) which I really love as it has none of the sugary sickliness of some pinks. Beautiful x
I would never have thought of having open shelving in the kitchen but actually thinking about it, It might encourage me to keep only the things I needed. Thanks for the inspiration!
Oh hon it looks amazing!! crazy how a little bit of work can make such a huge difference to a room! I can’t wait to get out of rented accomodation so we can finally put a stamp on our place x
Love your open shelves, soft pink walls and leather handles it all looks fab!
Oh my goodness. This is just beautiful. You’ve totally transformed the space. I love the colour you chose and the way you’ve styled the shelves. I hope you enjoy the new space.
It is is a stunning make-over and so calm. Not only is your Besta cabinat floating on air I think you must be too? huge congrats on a successful job done!
Oh it looks beautiful Katy! Love the leather handles in particular x
Wow!!! What a difference…. I am so uber jealous of you fresh, clean, creative look that I am actually turning green from my toes up! You have inspired me Katy orme!
There is not one thing I don’t love about your kitchen makeover! The white tiles are my ABSOLUTE favourite and I would LOVE to strip ours back and start again! (We have mottled cream – eugh!) The leather door handles are a revelation too. I’ve not seen anything like them before!
This is gorgeous…absolutely love the leather handles!! Interested to hear you love your open shelves, I am contemplating this but haven’t decided yet – thought of the dust!! Am thinking it would probably be worth the extra effort!
Beautiful! I would have never thought to use a soft pink in the kitchen. Matte tiles look great!! Are they hard to keep clean?
Also, I LOVE the terrarium on your console
Author
Hi Elisa,
Thank you so much! The tiles are not difficult to keep clean at all. They re still wipe clean and do have a slight sheen to them so no different to gloss in that respect x
I totally love everything you do…Why didn’t I think of using bookmarks for cupboard door handles.!? I collected leather bookmarks from everywhere I visited as a child I have over a hundred…I knew they’d come in handy TY xx